Shoes for Rainbows
I recently started working with Shoes as part of making a game and being inspired to do so by some talks at RubyConf. Shoes is an awesome little toolkit for making GUI interfaces for your code, written in Ruby. I also recently had need to make a rainbow using Shoes and thought it might be a helpful exercise to write up my process to share with you.
Also, I’m going to write this with the idea that you have just installed shoes and that this is maybe one of the first few things you’ve ever done in shoes. I’m also writing this as if maybe you are new or newish to Ruby. If that’s not you and you still want your rainbow, just skoodle on down to the end. Yes?
Ok, so let’s start making this rainbow, shall we?
Shoes.app width: 600, height: 600 do
end
It’s so beautiful! And there isn’t even anything there yet. It’s just an old window 600 by 600 on your computer screen, but… that’s still sorta cool, isn’t it? Let’s add a stack that’s going to hold all of our colors.
Shoes.app width: 600, height: 600 do
  @color_stack = stack do
  end
end
Stacks are containers for things in shoes. And this is looking pretty good, hey? But it’s still just a window and there’s nothing much to see here cause there’s nothing in the stack. Let’s fix that.
Lets reach for an easy shape to start with. I like rects cause they are rectangles and they are pretty easy to understand. They take a few arguments: the left point, the top point, the width of the rectangle, and the height of the rectangle.
Shoes.app width: 600, height: 600 do
  @color_stack = stack do
    rect left: 10, top: 10, width: 100, height: 10
  end
end
Cool. That’s more like it! That’s a rectangle alright. Now, in Shoes the left is the left side of the window. The top is the top of the window. That makes sense! What’s a little confusing, maybe is that if we want another rectangle below or under or first one we have to increase the top number. This is the top offset, so the lower in the window, the higher the value. Not too confusing, though, yes? Lets give our little rectangle a friend.
Shoes.app width: 600, height: 600 do
  @color_stack = stack do
    rect left: 10, top: 10, width: 100, height: 10
    rect left: 10, top: 30, width: 100, height: 10
  end
end
Sweeeeeeet. But this isn’t very… rainbowy. We’re missing some serious color. Fill!
Shoes.app width: 600, height: 600 do
  @color_stack = stack do
    fill red
    rect left: 10, top: 10, width: 100, height: 10

    fill blue
    rect left: 10, top: 30, width: 100, height: 10
  end
end
Fill is like your photoshop paint bucket, it defines the color inside the shape you’re drawing. Shoes is nice, and also smart, so it already knows the color red. Thanks, Shoes! Now if you look at this little program you’re gonna notice the black border around the rectangles. Um, also, again, hate to say it, not 👏 very 👏 rainbowy 👏. Thats the pen that drew the box that then got filled red. In Shoes, it’s called the stroke. Stroke!
Shoes.app width: 600, height: 600 do
  @color_stack = stack do
    fill red
    stroke red
    rect left: 10, top: 10, width: 100, height: 10

    fill blue
    stroke blue
    rect left: 10, top: 30, width: 100, height: 10
  end
end
Nice. Well, not much left to do here, but remember our friend Roy G. Biv, and draw it out! I’m going to snug the colors up against each other also, but not having a gap between the top of the next rectangle and the bottom of the first one. We know where that is because it’s the top of the rectangle plus the height.
Shoes.app width: 600, height: 600 do
  @color_stack = stack do
    fill red
    stroke red
    rect left: 10, top: 10, width: 100, height: 10

    fill orange
    stroke orange
    rect left: 10, top: 20, width: 100, height: 10

    fill yellow
    stroke yellow
    rect left: 10, top: 30, width: 100, height: 10

    fill green
    stroke green
    rect left: 10, top: 40, width: 100, height: 10

    fill blue
    stroke blue
    rect left: 10, top: 50, width: 100, height: 10

    fill indigo
    stroke indigo
    rect left: 10, top: 60, width: 100, height: 10

    fill violet
    stroke violet
    rect left: 10, top: 70, width: 100, height: 10
  end
end
Now you’ve got this!
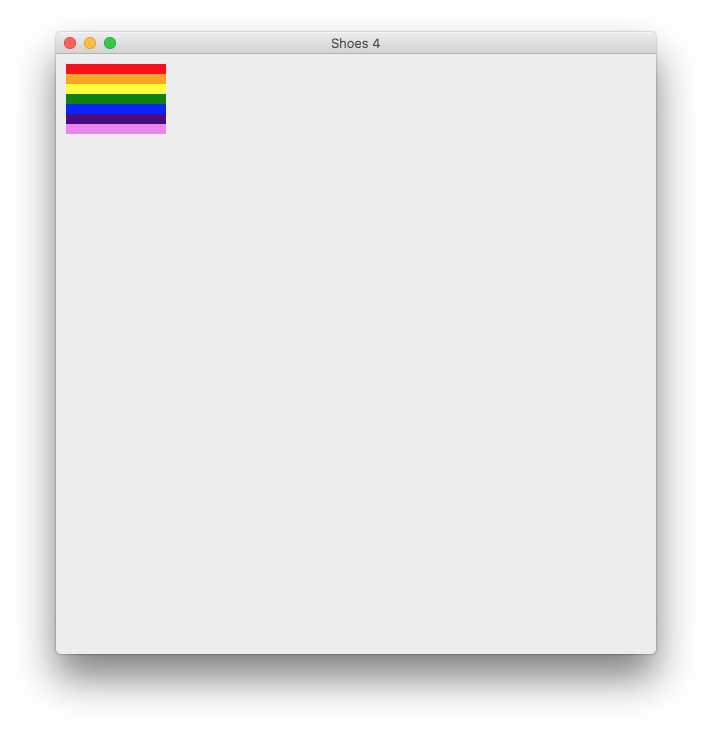
Sweet! Though it’s sort of tedious to write isn’t it? And it doesn’t feel very rubyish. Well, and this is one of the things I think is so cool about Shoes, it’s all just ruby! So we can use all of our ruby tools like we would usually. Looking at it, there are a lot of things that are the same so how bout we clean that up? Let’s make all the things that stay the same constants? And lets notice that the only thing that increases is the top of each band of the rainbow and make that into a variable. So we’re going to add to that the value of the band height for each subsequent band of the rainbow.
And lastly, lets put all those colors into an array and go through them in a loop! Why not?
RAINBOW_WIDTH = 100
BAND_HEIGHT = 10
RAINBOW_LEFT_POSITION = 10

Shoes.app width: 600, height: 600 do

  colors_of_the_rainbow = [red, orange, yellow, green, blue, indigo, violet]
  top = 10

  @color_stack = stack do
    colors_of_the_rainbow.each do |color|
      fill color
      stroke color
      rect left: RAINBOW_LEFT_POSITION,
           top: top,
           width: RAINBOW_WIDTH,
           height: BAND_HEIGHT

      top += BAND_HEIGHT
    end
  end
end
Looking good. That’s a rainbow to be proud of. Or, well, is it? What if it wasn’t. I’ve seen a few rainbows in my life, and that rainbow is a square. I’m sorta thinking it should be, like, rainbow shapped. Check it. Lets switch out that rect for an arc.
Arc’s are cool but can also be confusing because it requires remembering a couple of things from trig. This is the basic format of an arc in Shoes:
@my_arc = arc left, top, width, height, angle1, angle2
Ok, thats all pretty much the same as the rectangle, but we’ve got two new things, those angle1’s and angle2’s. Angle1 is the first angle, where 0 is at the 3 o’clock position in a circle. If you look at this diagram, angle1 = 0 is the red line, angle2 is the angle to draw the second line at, which is the purple line. These two lines describe the arc of the circle in yellow.
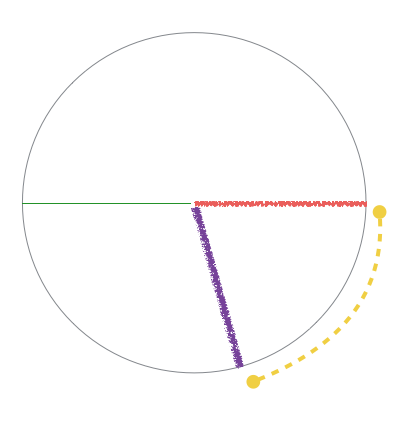
One thing that I didn’t know that gave me a whole mess of trouble was that Shoes likes to refer to these angles in Radians. I also didn’t know that 0 degrees was 3 o’clock; I thought 0 degrees was 12 o’clock and 3 o’clock would’ve been 90 degrees. On top of that, if you give the arc angles as 0 and 90, you get a circle! Whhaaaa?
Thats because the pen is drawing the arc 90 radians around which is ~5156 degrees, which if you don’t see it going round and round, just looks like a circle.
So! Remembering (or looking it up as I did) that there are 2 pi radians in a circle, if we want our rainbow arc to start on the left side and go around, aka, be a half circle, we’re going to use the angle1 as Shoes::PI and the angle2 as 0. Shoes has some nice things to help with PI, like having it conveniently stored in a constant for you.
So with some modifications, we get this code:
RAINBOW_WIDTH = 100
BAND_HEIGHT = 100
RAINBOW_LEFT_POSITION = 10

Shoes.app width: 600, height: 600 do

  colors_of_the_rainbow = [red, orange, yellow, green, blue, indigo, violet]
  top = 10

  @color_stack = stack do
    colors_of_the_rainbow.each do |color|

      stroke color
      arc  left: RAINBOW_LEFT_POSITION,
           top: top,
           width: RAINBOW_WIDTH,
           height: BAND_HEIGHT,
           angle1: 0,
           angle2: Shoes::PI

      top += BAND_HEIGHT
    end
  end
end
Which gives us this screen shot:
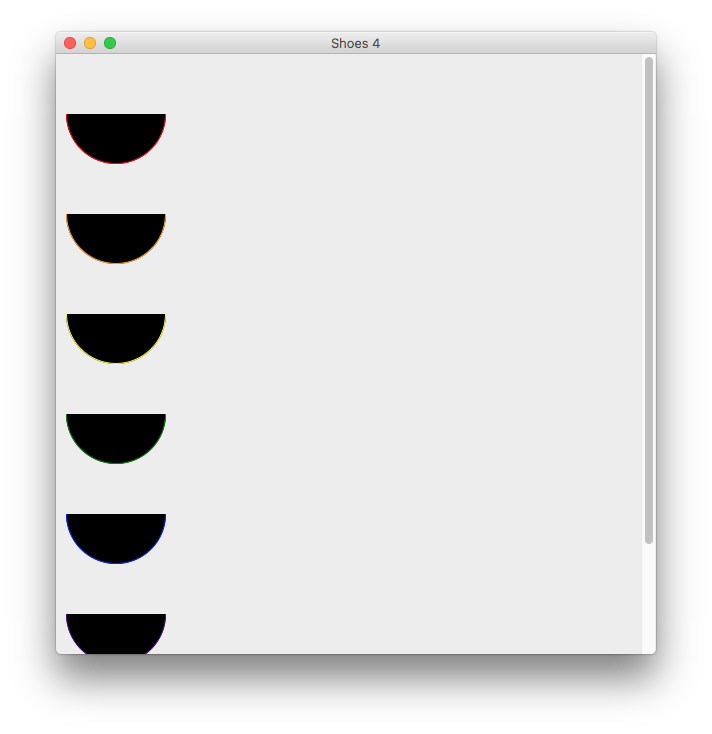
Which for sure is not what we’re after. Shoes defaults to filling shapes with things. The way to fix this is with the easy nofill command, but that still wouldn’t fix this. We’re also going to control the thickness of the arc by using the strokewidth command, which will be how thick the pen is that’s drawing the arc.
And, of course, these arcs are also ‘upside down’ so to speak. And the spacing is all wrong. One thing at a time! So lets tell Shoes to draw our arcs starting on the left side of the circle (which is Shoes::PI) and draw from there to 0. And for spacing, that’s also a little trickier.
We want the height and width of the the arc to be equal so that the arc isn’t distorted in any direction. So let’s see what these changes get us to.
RAINBOW_WIDTH = 100
BAND_HEIGHT = 100
RAINBOW_LEFT_POSITION = 10

Shoes.app width: 600, height: 600 do

  colors_of_the_rainbow = [red, orange, yellow, green, blue, indigo, violet]
  top = 10
  band_thickness = 10

  strokewidth band_thickness
  nofill

  @color_stack = stack do
    colors_of_the_rainbow.each do |color|

      stroke color
      arc  left: RAINBOW_LEFT_POSITION,
           top: top,
           width: RAINBOW_WIDTH,
           height: BAND_HEIGHT,
           angle1: Shoes::PI,
           angle2: 0

      top += BAND_HEIGHT
    end
  end
end
And that gives us:
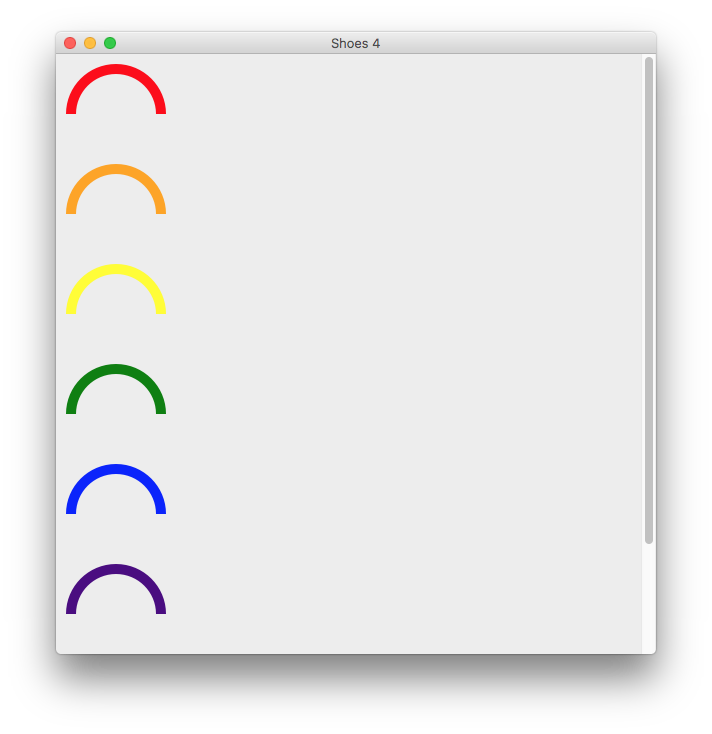
Which is really looking good and we need one more fix! Rainbows don’t stack like that. The colors have to go ‘inside’ the previous one. How are we gonna do that?! Well, we previously made the decision to have all these constants because things weren’t changing that much. But now the left of the rainbow is going to change on every band, getting further from the left side and nesting in the previous color. The top is going to get lower to make sure the top of the arc is also nested correctly. The width and height are also going to change because the overall dimensions are going to also have to get smaller and smaller for each successive band.
So making those changes we wind up with this final logic:
Shoes.app width: 600, height: 600 do
  colors_of_the_rainbow = [red, orange, yellow, green, blue, indigo, violet]

  band_thickness = 10
  draw_left = 100
  draw_top = 200
  band_width = 400
  band_height = 400

  nofill
  strokewidth band_thickness

  colors_of_the_rainbow.each do |color_rgb|
    stroke(color_rgb)

    arc draw_left, draw_top, band_width, band_height, Shoes::PI, 0

    draw_left += band_thickness
    draw_top += band_thickness
    band_width -= (band_thickness * 2)
    band_height -= (band_thickness * 2)
  end
end
Cool!
A couple of changes to note: I’m drawing much further to the left and from the top to start with in order to get my rainbow in the middle of the screen. I’m also trying to draw a bigger rainbow because… it’s a rainbow!
Also, notice how the left and top are being added to in order to move the starting point of the arc down and to the left. That wasn’t initially obvious to me. And the width and height are getting smaller, the square of the arc getting smaller to fit the band in side of the previous band. And that band_thickness * 2? We want to account for the width of the band on the left side AND the right.
And lets see what all that gives us!

Yes! I say yes!
A final thought. One great thing about working with tools like Shoes is that even though it has all these special methods and ways of doing things (like strokewidth, nofill, arc, rect and even how the coordinates are referenced) its also still just Ruby. Learning how to mix Ruby ways of doing things, like putting the colors in an array, with the framework of Shoes helps develop the same skills that people use when using other frameworks like Rails. Love it.
I hope this was fun and made sense and helped describe a way for thinking about working with things in Shoes. If anything is not clear, email me or tweet me and I’ll try to fix it up or make it clear. If you have any questions about getting started with Shoes or anything else on that front, let me know, please and I’ll see what I can do. If I’ve gotten anything wrong about my understanding about shoes, please also let me know!
Lastly, Shoes is an awesome community. If you want to learn a little more about them, follow some of the links below.
Thanks for following along and Shoes on!
Here’re some relevant links for futher illumination and investigation: